


 Striking Mag Photon Blast:
 Shooting Mag Photon Blast:
 Force Mag Photon Blast:
 Ability/Skill Mag Photon Blast:


PSO2: The Character Creator Demo is Up! Plus Mini Guide!
Hello, the Phantasy Star Online 2 Character Creator is up. You do not need a SEGA ID to download it. You don’t have to be in the Alpha nor Beta Test to download it. You can download it for free and use it to your heart’s content and share it to your friends.
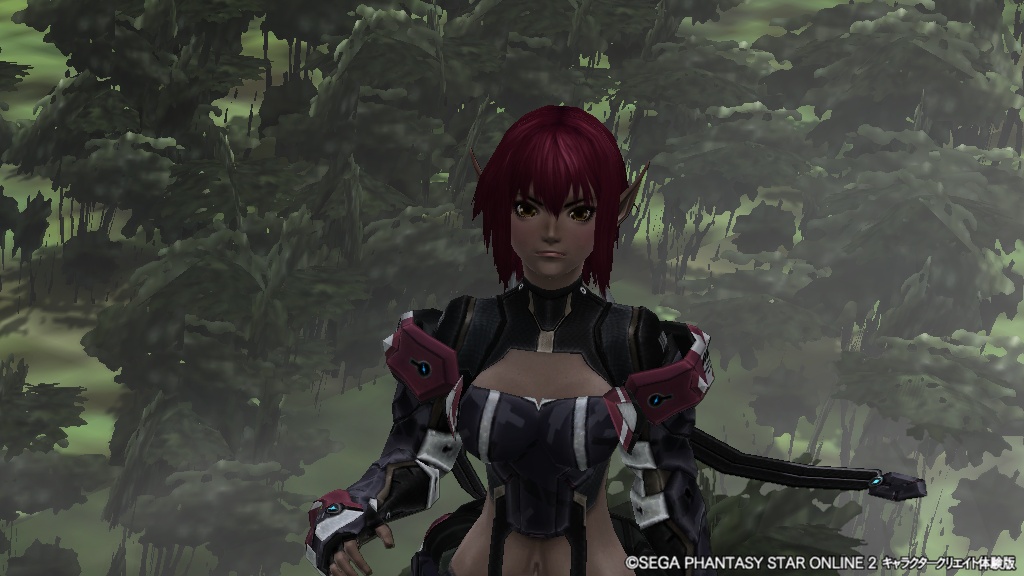
You must download the file from here.
Though the Character Creator is in Japanese, most of the options are visual and can be figured out without any Japanese knowledge. However certain areas need to be explained. This post will expand explaining a few particular features as it becomes available.
This post is currently unfinished!
Screenshot Guidelines:
- Please follow these guidelines because you may trigger a copyright violation if you don’t follow these steps.
- On the bottom of each screenshot you must write: (C)SEGA
- On the page you post your images please place:
「画像は『PHANTASY STAR ONLINE 2』キャラクタークリエイト体験版において撮影された実機画像です。」『PHANTASY STAR ONLINE 2』公式サイト
http://pso2.jp/
- You can crop, and resize the screenshots you take and edit them to place the copyright text.
- If you take screenshots within the game it will automatically add the copyright text for you.
Video Guidelines
- At the beginning and end of your video insert the: (C)SEGA for more than 2 seconds.
- Also you must include this text in your video description.
「『PHANTASY STAR ONLINE 2』キャラクタークリエイト体験版において撮影された実機動画です。」『PHANTASY STAR ONLINE 2』公式サイト
http://pso2.jp/
- You may not use other music and videos in combination with the Character Creation footage. You may not change the playback speed either.
- But you are allowed to edit the video to insert the copyright information.
Startup Screen and Settings

- Game Start ゲームスタート
- Settings 環境設定
- File Check ファイルチェック
- Close 終了
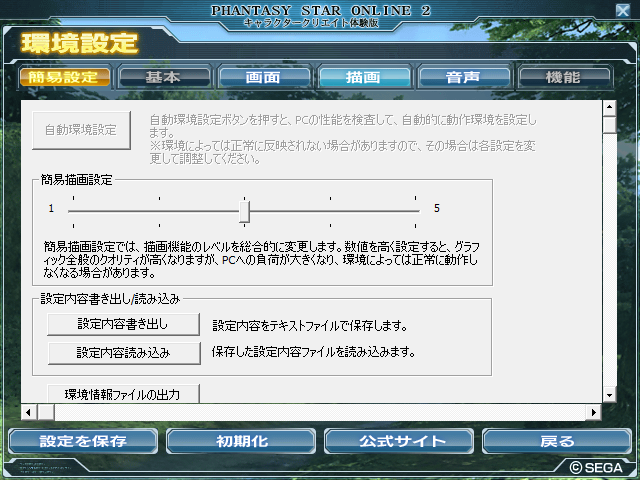
In your settings options, you can quickly set the graphical settings for the game. Level Five is the highest and Level One is the lowest. Please note that there are 2 shader options, simple and standard. Your graphics card may not be able to handle standard shaders and can crash the game to desktop. You may need to update your graphics card drivers for it to work. Any setting 3 or higher will use standard shaders by default.

To save your settings, follow these steps
- Look for the left most blue button at the bottom.
- Click 設定を保存 (Save Settings)
- A blue box will open up, click 戻る (Return)
- Look for the last blue button at the bottom.
- Click 戻る (Return) to reach the startup screen.
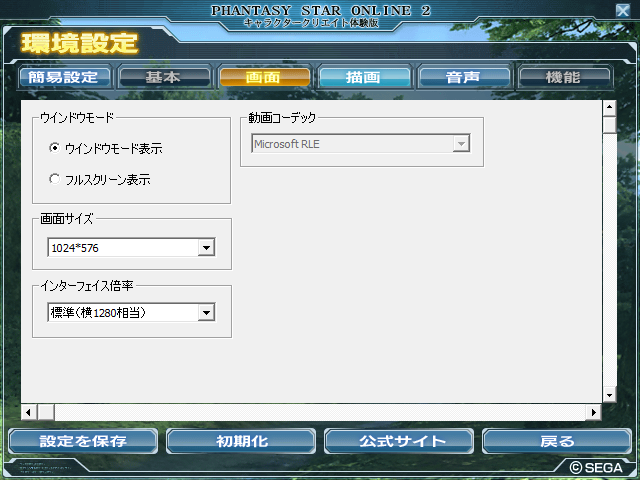
The third page in settings (画面) changes resolution and windowed mode.
ウィンドウモード Window Mode
- ウィンドウモード表示 Window Mode
- フルスクリーン表示 Full Screen Mode
画面サイズ Screen Size
- Choose a Window Resolution Size
インターフェイス倍率 Interface Zoom
- Standard Zoom
- 1.25x Zoom
- 1.5x Zoom

The fourth button at the top (描画) changes your shader and texture settings
テクスチャ解像度: Texture Resolution [Left Column]
- 高解像度 High Resolution
- 通常 Normal
- 圧縮 Compressed
シェーダー品質: Shader Quality [Right Column]
- 標準 Standard
- 簡易 Simple
Editing Shader Settings
Basically there are two settings, one inside the actual game, and one before you run the game. If you have been reading the whole post up until now, you’ve been changing your graphical settings outside of the game.
However, in this demo, it seems they have disabled you from changing in game specific shader settings. So as a workaround you can also edit these shader settings in a text file and in ENGLISH too!
In your Documents\SEGA\PHANTASYSTARONLINE2 look for a file called “user_benchmark.pso2“, and open this file in notepad.
Function = {
Reflection = true,
LightGeoGraphy = true,
LightShaft = true,
Depth = true,
Bloom = true,
LightEffect = true,
Blur = true,
AntiAliasing = true,
},
You can change these Shader settings to false if you are having trouble running the game with “Standard” shaders on. The game will definitely run faster than before but that’s still really dependent on your computer specs. *Please take note that changing these shader settings won’t have any effect on performance if you’ve already set the shader to simple. “ShaderQuality = true,” is the same as using “Standard” shaders.
You can also change the shadow settings in this file too.
Save and Load Characters
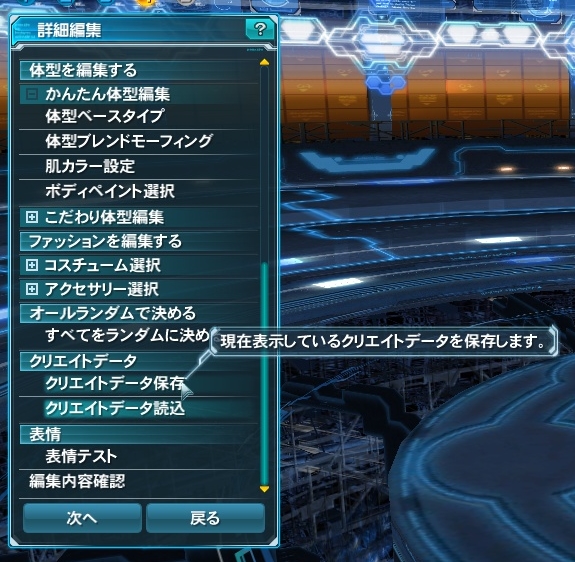
The mouse is hovering over the button where you save your character.
Near the bottom of the character creation screen, you can save and load characters that you’ve made and use them in the Closed Beta.
クリエイトデータ Character Creation Data
- クリエイトデータの保存 Save Character Data
- クリエイトデータの読込 Load Character Data
In your Documents\SEGA\PHANTASYSTARONLINE2 folder your character save data is stored as the name of the file with the extensions:
- Male Human .mhp
- Female Human .fhp
- Male Newman .mnp
- Female Newman .fnp
- Male Casts .mcp
- Female Casts .fcp
You can send this file around to other players.
Facial Sliders and Adjustments

Throughout character customization you may see some sliders that have drop down menus. The cool thing about PSO2′s character creator is that you can blend different face types together, like if you want a cross between a cynical and pudgy face, you can certainly do it! If you don’t happen to know what a face type actually says, you can test the waters by choosing a face type and moving the yellow point close to the name.
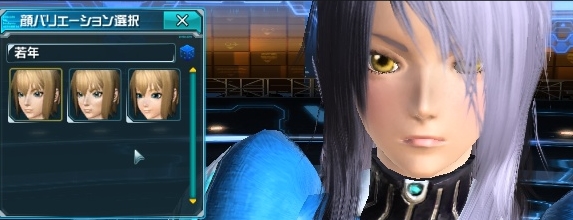
顔バリエーション選択 Facial Variations
Each face template under Facial Variations has different facial blending styles. For simplicity sake we have split them up into Type 1 and Type 2.
Type 1 is the default facial template, while Type 2 seems to be new facial templates.
Type 1 is the default facial template, while Type 2 seems to be new facial templates.

When you click on any of these four drop down menus in the game you will see a list. You can select these.
顔ブレンドモーフィング (Face Blend Morphing) for both sexes (Type 1)
- クール系 Cool
- 熱血系 Hotblooded
- 癒し系 Soothing
- ガッチリ系 Rugged
- クール系大人顔 Cool Adult Face
- 熱血系大人顔 Hotblooded Adult Face
- 癒し系 大人顔 Soothing Adult Face
- ガッチリ系大人顔 Rugged Adult Face
- クール系子供顔 Cool Child Face
- 熱血系子供顔 Hotblooded Child Face
- 癒し系子供顔 Soothing Child Face
- ガッチリ系子供顔 Rugged Child Face
顔ブレンドモーフィング (Face Blend Morphing) for Males (Type 2)
- シャープ Sharp
- コミカル Comical
- ぽっちゃり Chubby
- シニカル Cynical
- シャープ面長 Sharp Long Face
- コミカル面長 Comical Long Face
- ぽっちゃり面長 Chubby Long Face
- シニカル面長 Cynical Long Faces
- シャープ小顔 Sharp Short Face
- コミカル小顔 Comical Short Face
- ぽっちゃり小顔 Chubby Short Face
- シニカル小顔 Cynical Short Face
顔ブレンドモーフィング (Face Blend Morphing) for Females (Type 2)
- シャープ Sharp
- 元気 Genki
- ぽっちゃり Chubby
- ミステリアス Mysterious
- シャープ面長 Sharp Long Face
- 元気面長 Genki Long Face
- ぽっちゃり面長 Chubby Long Face
- ミステリアス面長 Mysterious Long Face
- シャープ小顔 Sharp Short Face
- 元気小顔 Genki Short Face
- ぽっちゃり小顔 Chubby Short Face
- ミステリアス小顔 Mysterious Short Face

A cynical male face.
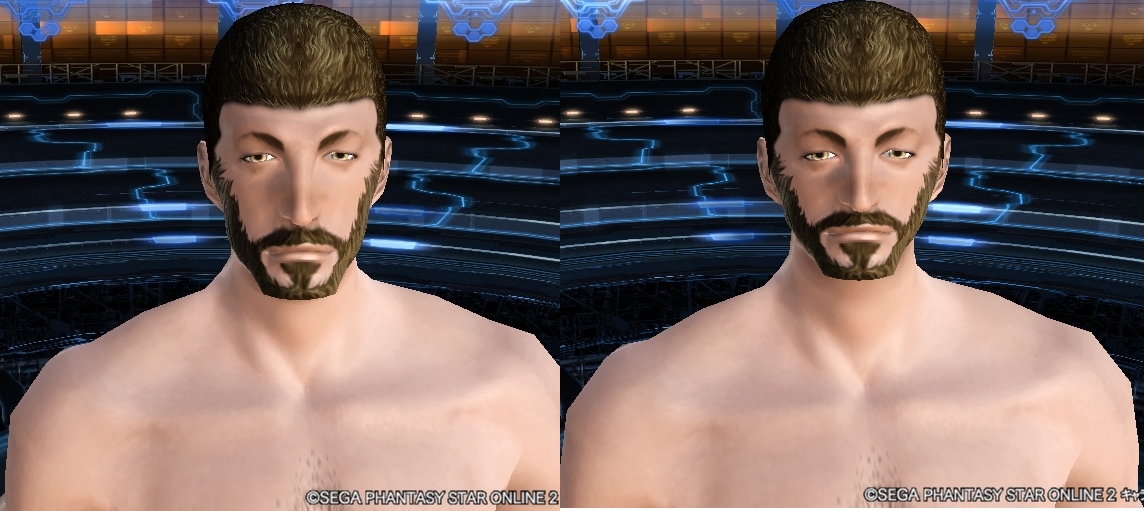
シニカル面長 / シニカル小顔
Cynical Long / Cynical Short
Cynical Long / Cynical Short
Body Morphing
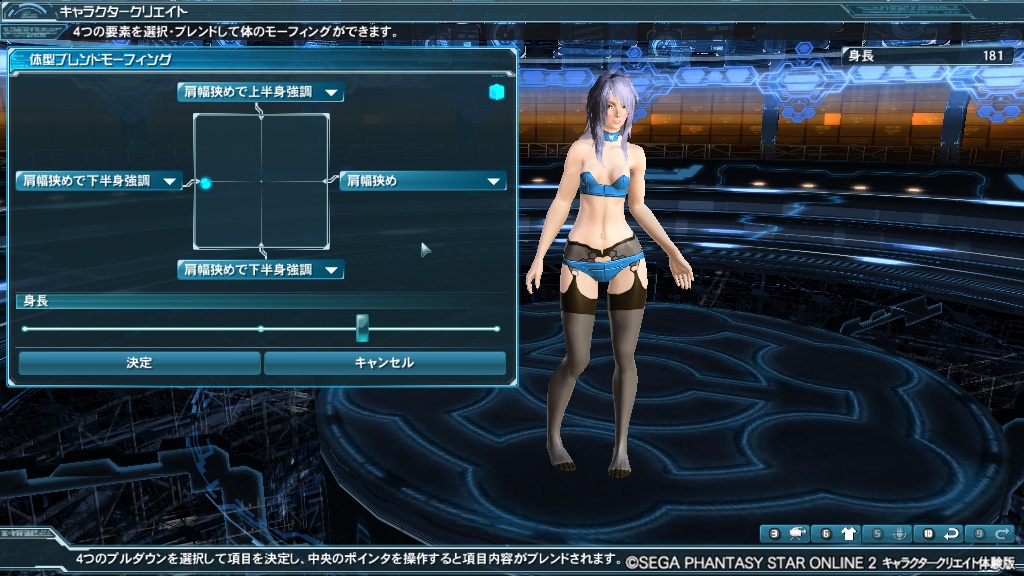
Just like facial sliders, body morphing lets you change the thickness and size of your entire body. This slider allows you to choose weight distribution too as we will outline below.
体型ブレンドモーフィング Body Blend Morphing for Females
- ぽっちゃり Chubby
- 細め Thin
- 肩幅狭め Narrow Shoulders
- グラマー Glamour
体型ブレンドモーフィング Body Blend Morphing for Males
- ガッチリ Rugged
- 細め Thin
- 肩幅狭め Narrow Shoulders
- 太め Plump
Emphasis can also be selected with the drop down menu. You will see these suffixes:
- _ _ _ _ で上半身強調 Emphasize Upper Portions
- _ _ _ _ で下半身強調 Emphasize Lower Portions
Here’s an example:

ぽっちゃり で上半身強調 / ぽっちゃりで下半身強調
Chubby Upper Areas / Chubby Lower Areas
Chubby Upper Areas / Chubby Lower Areas
Benchmark Scores
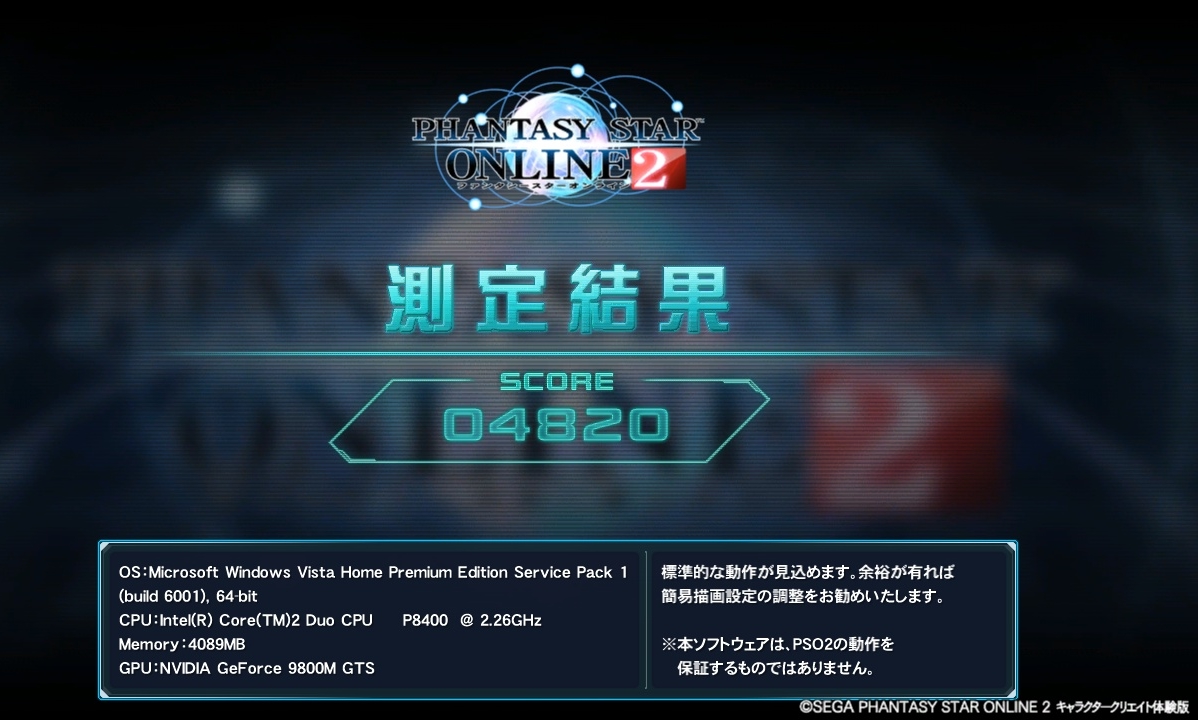
- ★ Less than 2000: Please adjust your game settings because the processing load is quite heavy.
- ★★ 2000 through 5000: The game runs fine at the setting, if you have room, you can adjust some settings.
- ★★★ 5001+: The game works wonderfully at this setting.
